The 5S method gained popularity after the Toyota used 5S principles to successfully increase production while reducing costs. Today, we recognize that creating a tidy environment goes beyond the realm of car-making. Knowing how messy scientists can be, we look at how we can apply 5S in the laboratory to reduce waste and increase output!
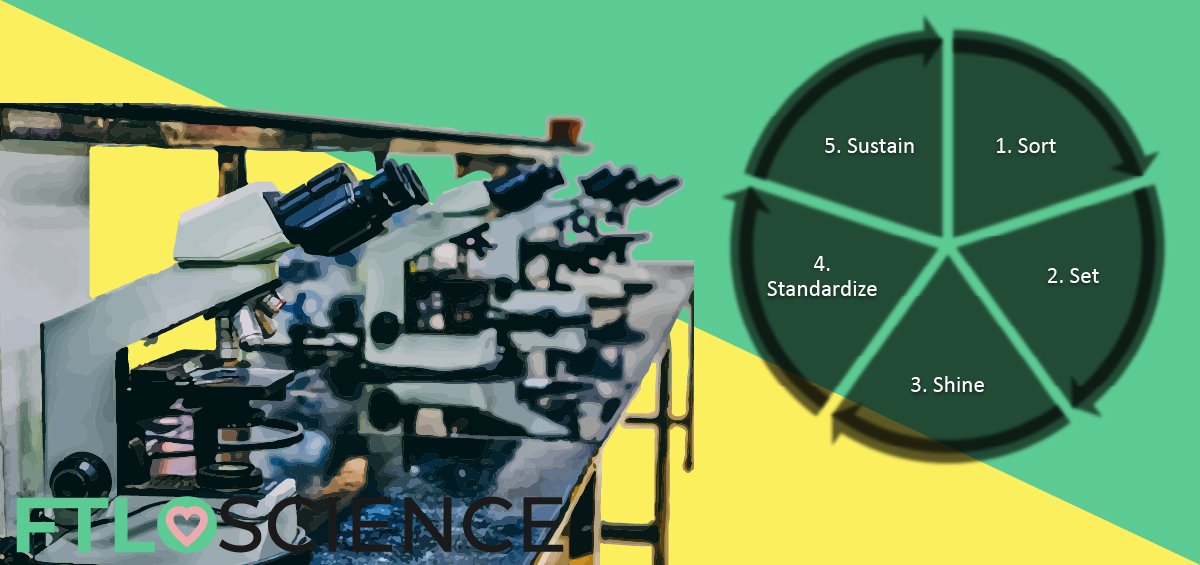
5S is a step-by-step method to improve and maintain a clean and efficient workspace. Read on for the 5 steps (sort, set, shine, standardize and sustain) that you can implement in your lab. We break down each step to make it easy to follow, providing lab-related checklists and examples along the way.
| 5S Step | What should be done |
|---|---|
| Sort | 1. Divide laboratory it into manageable sections 2. Sort through everything, keeping only what is needed 3. Repeat for each section until lab is sorted |
| Set | 1. Assign a specific location in the lab for each item 2. Excess inventory should be stored outside the lab |
| Shine | 1. Clean! 2. Display a picture of how the lab should look after use |
| Standardize | 1. Use checklists to maintain housekeeping standards 2. Extends to routine laboratory processes |
| Sustain | 1. Sustain the practices implemented above 2. Divide the lab and assign area owners 3. Conduct walkthroughs and identify improvements |
Step 1: Sort
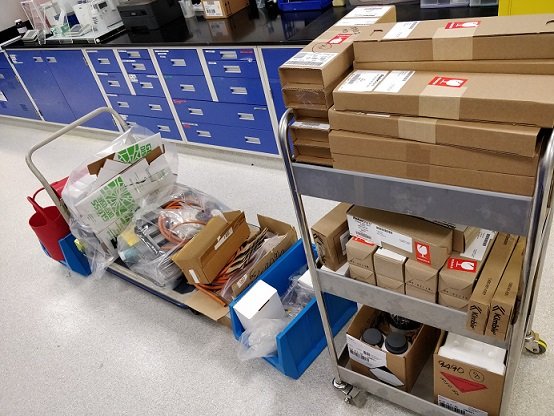
To kick start the 5S process, we first need to divide the lab into sections and decide in what order we’ll sort through them. It’s not recommended to perform this step for the entire lab at once because of how messy it will be, but if your lab is small and you have enough people to help you, then go for it!
Now we can begin Step 1, to sort through everything in the area and decide if it’s worth keeping. And I mean EVERY thing; literally stare at each object and ask ‘Do I need you?’ You want to keep your lab lean and mean, with no room for clutter. Don’t hold on to objects based on sentiment or because “it might come in useful later”. This applies to glassware, chemicals, equipment, disposables, even books and papers. Focus on what will help with your experiments right now, throw the rest out or find a place outside the lab to store it.
Now work through each section until the entire lab has been sorted. This step will sure leave your laboratory in a mess, but I promise it’ll all be worth it in the end!
Step 2: Set
Now that you’ve identified the useful objects that will stick around, Step 2 is to assign (Set) a space in the lab that they can call home. This can be inside a cabinet (for glassware and chemicals) or within a specific area on the lab bench/floor. Try to prioritize the commonly used items (Kimwipes, beakers, etc.) so that they’re easy to locate and reach, saving us time.
It should be obvious where each item belongs; we can print color-coded labels or mark out areas with tape to help with this. Ensure that after each use, it’s returned to its rightful home.
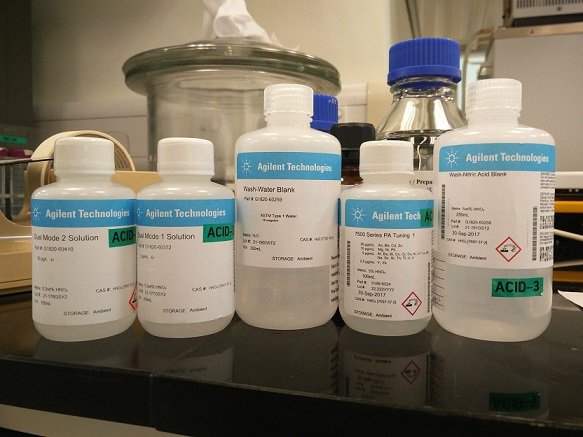
Take note of the quantity of each item in this step. We often find that we have too many pieces of the same glassware, or too many of the same chemical that will take us years to use! The best way to deal with excess inventory is to take stock of it in a spreadsheet and store it outside the lab, in a warehouse or storage area. If this isn’t possible, pack them neatly and store in corner cabinets, high shelves, etc., ensuring they don’t take up prime real estate in the lab.
Managing chemical inventory is unique to laboratories, since certain chemicals have short shelf lives or require special storage conditions. Keeping a record of each reagent’s quantity, location and expiry date ensures a reliable supply without overstocking, saving money and space.

Step 3: Shine
With everything in its rightful place, the next step in 5S is to clean your laboratory in Step 3: Shine! Cleaning isn’t limited to the surface of benchtops and fume hoods, it also applies to glassware and equipment. Set a standard for cleanliness with pictures to show how the area should look like at the end of the day.
One benefit of keeping the workspace clean is that it reduces the chances of contamination; you can be more confident in your results by maintaining a clean laboratory.

Step 4: Standardize
So you’ve completed the last three steps and have a brand new (looking) lab! But now isn’t the time to put your feet up and enjoy a cup of coffee. Not yet, anyway. We need a system to maintain this tidiness level so we don’t slip back into our old habits. This is where Step 4 (Standardize) comes in.
We need to transform good housekeeping from a yearly activity into second nature. Just like all other habits, this is acquired through practice. Checklists are a good way to build habits easily since they’re easy to follow. Here are 2 example checklists:
5S Checklist: Before Leaving The Lab
- Are benchtops clean and free of clutter?
- Chemicals and reagents placed in correct storage?
- Waste cans emptied?
- Gas, power, water lines off?
- Are overnight connections secure?
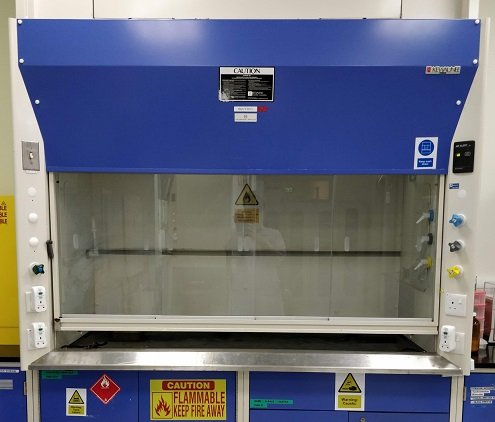
5S Checklist: After Using the Fumehood
- Remove all glassware and chemicals
- Wipe down surfaces
- Ensure power and gas lines are turned off
- Lower fumehood sash
- Turn light and ventilation off
- Walk away smiling with satisfaction
The awesome thing about these checklists is that they can also be applied to lab practices that are routine. Performing PCR, for example, or making a batch of solvent. This ties back into Step 2 (Set), where we can ensure all the items we need to fulfill the checklist are within reach of each other.
Step 5: Sustain
The final step (Sustain) is the most challenging step of 5S. Many laboratories that implement 5S find that they quickly go out of steam before they can get the habit of good housekeeping to stick. During these vulnerable first few months, it is important to reinforce the standards set.
First, we can assign an area to each member of the lab. The area owners are responsible for their zones, making sure everyone who uses it keeps it clean and tidy. This creates a mindset that maintaining the state of the lab is everyone’s responsibility.
Once everyone is on board with the housekeeping rules, you can conduct regular walkthroughs with the team to ensure each area is properly maintained. Walkthroughs aren’t just for calling area owners out, however. They remind everyone in the team that they’re a big part of 5S in the laboratory. Encourage everyone to identify further improvements, even if outside of their assigned area. Remember that there is no ‘final goal’, each 5S activity is a continuous process!
5S in a Laboratory Improves Safety and Output
Most of us are guilty of messy benchtops and dirty fume hoods, excusing ourselves from cleaning up. “I’ve got more important things to do” or “oh, it’s going to be messy later anyway”. While applying 5S in your lab might be time-consuming initially, the beauty of the method is that good housekeeping quickly becomes a habit. If our workspace is tidy, we are more likely to leave the area in the same state as we found it.
A 5S-ready laboratory also ensures that we can easily tell when an object is out of place, which improves overall safety. Dangerous situations like broken glassware or spilled chemicals are not hidden by clutter, instead sticking out like a sore thumb.
We also improve our science output with 5S, since equipment, items
Just like how we can improve experimental results with systematic methods, we can similarly increase our output with consistent housekeeping housekeeping. Applying 5S to your laboratory provides a tried and tested
About the Author

Sean is a consultant for clients in the pharmaceutical industry and is an associate lecturer at La Trobe University, where unfortunate undergrads are subject to his ramblings on chemistry and pharmacology.